Google Summer of Code 2022
Hello everyone, I am Ayush Singh, a second-year student at the Indian Institute of Technology, Dhanbad, India. As a part of Google Summer of Code 2022, I will be working on Adding Rust Support for building UEFI Applications and Modules under the Tianocore organization. In this post, I will describe this project’s goals and set up my development environment.
You can follow my GSoC-related blog posts using this feed. I will currently be working under my personal fork. In the future, it might be moved into the edk2-staging repository. The final goal is to have the support merged upstream. However, that might not be immediately possible.
Project Goals
The current project goals, as discussed with the mentors, are given below:
- Get most of Rust-std running under the UEFI target
- Add testing support for UEFI target
- Pass all the general tests of
library/std - Possibly add support for ARM and RISCV UEFI targets (currently, only X86_64, AARCH64, and I686 are present)
Setting up Development Environment
Setup Rust
Install Rustup
I will be using rustup to install and manage Rust since I will be working with multiple versions of standard libraries and compilers.
|
It will ask for some options, but I just set it to default.
Install Rust toolchains
I will be installing stable as well as nightly toolchains. For Stable:
For Nightly:
Finally, add ~/.cargo/bin to PATH. Alternatively, we can just source $HOME/.cargo/env.
Setup rust project
Setup Git Repository
I will mostly follow the Getting Started section of the rustc-dev-guide for this. First, we need to clone the rust-lang/rust repository. I prefer using ssh:
Next, I will add my personal fork as a remote:
Install depenencies
Rust repository contains a script (x.py) to help us install most of the dependencies we need and configures the bootstrapping process. However, since we need to compile to a different target, we need to build rust-lld, which requires extra dependencies. Since I am using Fedora, I will list the command I used to install dependencies:
Next, we will use the script to configure our build.
Since I will mostly work on library/std, I select the library option during configuration. We will need to modify the generated config.toml since we will need rust-lld for cross-compilation. Here is my config.toml:
# Includes one of the default files in src/bootstrap/defaults
= "library"
= 2
[]
= "if-available"
= true
[]
= true
= true
Build toolchain
Now, we will build the local toolchain using the following command:
We build the stage1 compiler since we will need to use this compiler to build sample applications for testing (Since we cannot use the testing framework yet).
Finally, we will add this newly built toolchain using rustup:
Now we can use this toolchain to build any rust project.
Build a UEFI hello_world
Now to check that our new toolchain works, we will build a simple hello world application (no_std).
Create a binary application
Configure Cargo
First, we need to add the r-efi crate to Cargo.toml as follows:
[]
= "4.0"
Next, we will add a file .cargo/config.toml to configure building core and alloc. This way we do not need to specify build-std option at the commmand line.
[]
= ["core", "compiler_builtins"]
= ["compiler-builtins-mem"]
Finally, we will set the current project to use our local toolchain:
Main Code
Here is the code for src/main.rs file:
use efi;
!
pub extern "C"
Build and Test application
We can build the application using a normal cargo build now. To test the application, we will use qemu. To test out EFI applications in qemu, I have written a small python script. The hello_world.efi file that should be inside target/x86_64-unknown-uefi/debug/. Here is the output screenshot: 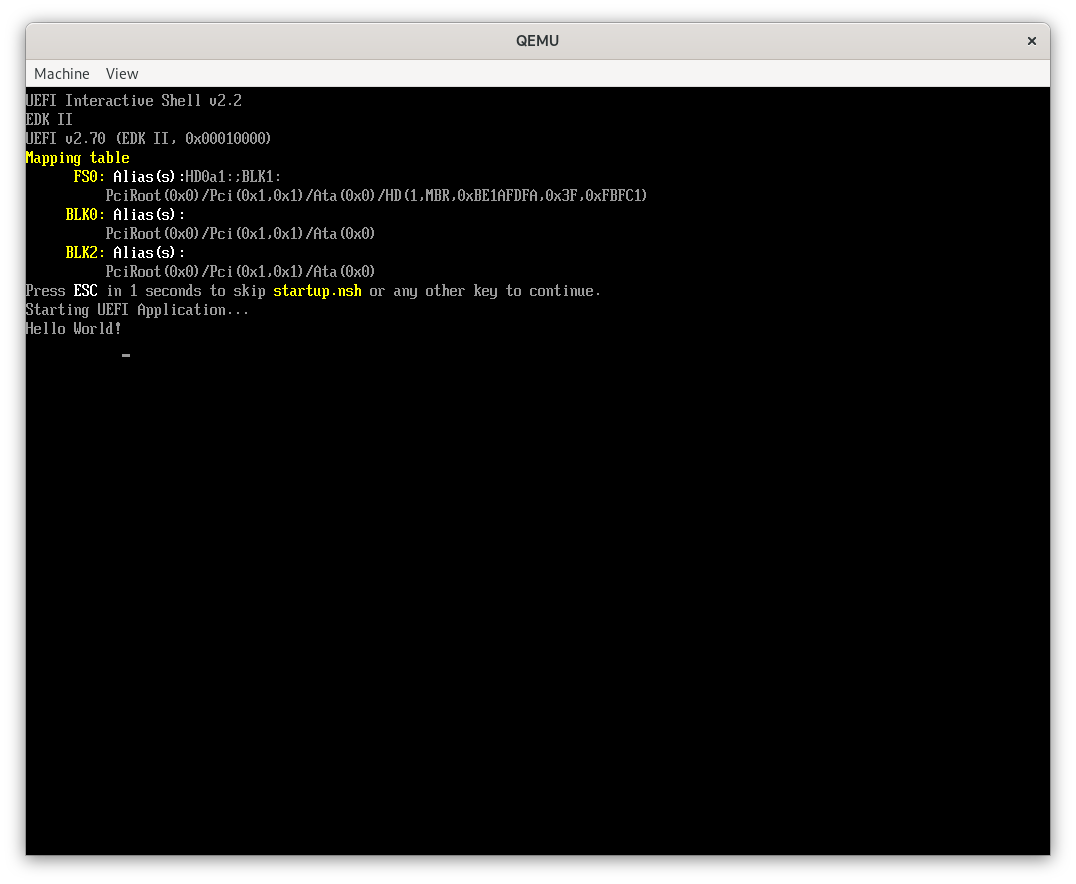
Conclusion
With this, we can start implementing parts of std for UEFI and testing them in actual applications. Feel free to ask/make any suggestions on the Tianocore mailing list.
Consider supporting me if you like my work.